How to Cut Slate Roof Tiles by Hand: A Step-by-Step Guide
Slate roof tiles, with their timeless elegance and remarkable durability, have been adorning roofs for centuries. To maintain and repair a slate roof, you might occasionally need to cut the tiles to fit specific areas or replace damaged ones. While modern tools like saws and tile cutters are commonly used for this purpose, sometimes you might find yourself needing to cut slate tiles by hand.
Tools You’ll Need:
Slate Cutter: This specialized tool is designed for cutting slate tiles and features a sharp, flat blade. If you don’t have one, a carbide chisel can serve as an alternative.
Slate Hammer: To gently tap and split the slate along the desired cut line.
Straight Edge: A sturdy, straight edge such as a metal ruler or a level is essential to guide your cut.
Safety Gear: Always prioritize safety. Wear safety glasses, gloves, and a dust mask to protect yourself from sharp edges and dust.
- Step 1: Preparing the Slate Tile
Before you begin cutting, make sure your slate tile is clean and free from dirt. Place it on a stable surface, like a workbench, with the area you want to cut extending beyond the edge. The tile’s face should be facing upwards.
- Step 2: Marking the Cut Line
Use a pencil or chalk to mark the exact line where you want to make the cut. Ensure that your line is straight and accurately measured. This line will be your guide throughout the cutting process.
- Step 3: Guiding the Cut
Position your straight edge along the marked line. Ensure it’s securely in place and aligned with the line. This will be your guide for the slate cutter or chisel.
- Step 4: Cutting with a Slate Cutter
a. With a Slate Cutter: Hold the slate cutter at one end of the marked line with the blade aligned to the line. Press down firmly and evenly on the cutter’s handle to score the slate. Make multiple passes if needed, increasing the pressure slightly with each pass.
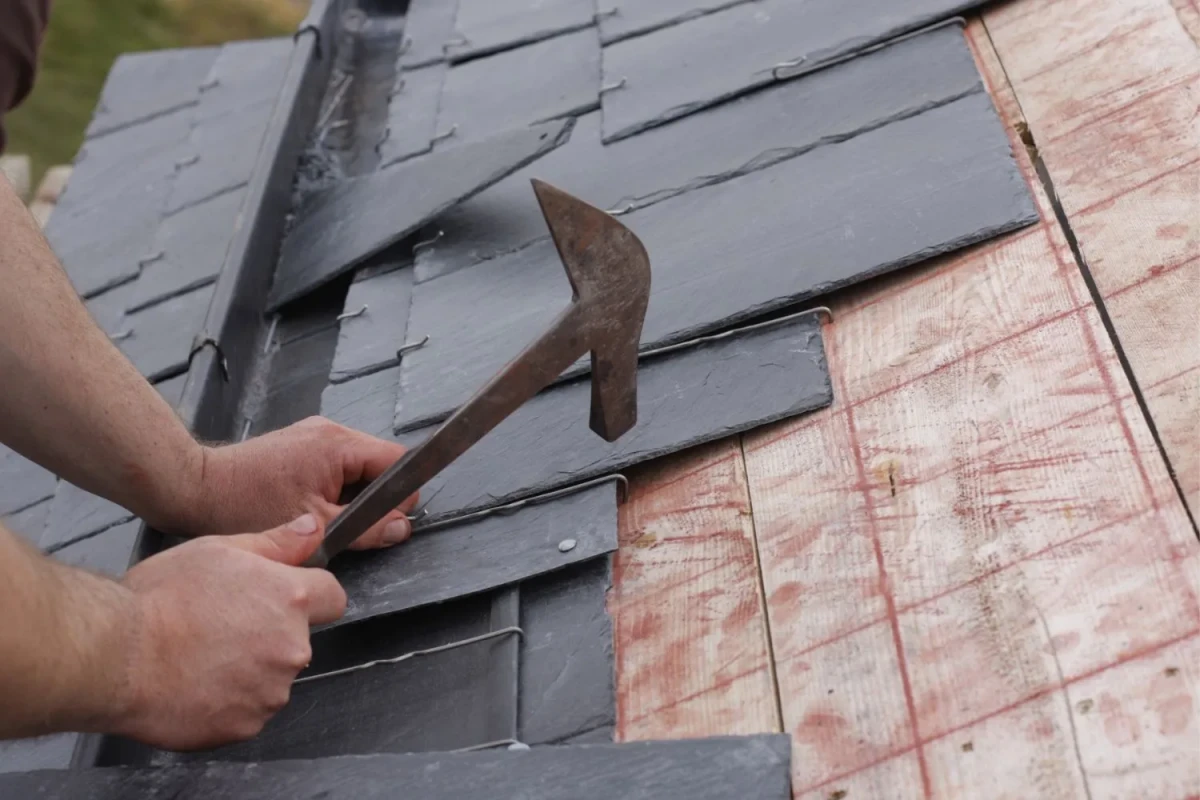
b. With a Chisel: If you’re using a chisel, align it with the marked line at one end of the slate. Hold the chisel at a slight angle and tap it gently with the slate hammer. Make sure your taps are consistent and along the line. Continue to tap, gradually increasing the force, until the slate splits.
- Step 5: Splitting the Slate
Once you’ve scored or chiseled the entire length of the marked line, it’s time to split the slate. Place the tile at the edge of your work surface, making sure the marked line aligns with the edge. Carefully apply pressure to the overhanging part of the slate, and it should break cleanly along the line. Ensure you’re wearing safety glasses during this step to protect your eyes from any flying debris.
- Step 6: Finishing
After the slate tile has been successfully cut, inspect the cut edges for any unevenness. Use a sharpening stone or sandpaper to smooth out any rough or uneven areas, giving your tile a clean and precise finish.
While cutting slate roof tiles by hand can be a meticulous process, it’s entirely achievable with the right tools and careful execution. Remember to prioritize safety and take your time to ensure accurate and clean cuts. With practice, you can effectively cut and shape slate tiles to maintain or repair your slate roof with precision and care.
2023-10-13